
Preparations
For Shopify, you need to prepare three websites:
- A white-label website created with Shopify, linked to the payment gateway.
- A white-label website built using WordPress or other PHP development platforms.
- A high-risk website created using WordPress, OpenCart, or ZenCart.
Download the B site files and upload them to the installation directory of your B site.
Upload this file to the installation directory of the white-label website you created using WordPress or other PHP platforms.
Upload the downloaded files to your website directory. If you use web hosting, this is typically under the public_html directory. You can also ask your hosting provider, your technical team, or contact us for assistance.
After uploading and extracting the B-site.zip file, you will get a folder named b-site. Copy all the files from this folder and paste them into your website directory.
Download the A site plugin, then upload and activate it on your website.
Click here to download
This file is a plugin to be applied to your high-risk website.
Download the A site files, which are plugin files. After downloading, unzip them on your computer and select the corresponding plugin package based on your website platform.
For example, if you are using WordPress & WooCommerce to create your website and need to use PayPal, you should upload and activate the WordPress & WooCommerce PayPal plugin from the downloaded files.
After activation, configure the plugin settings as follows:
- Username: Fill in your username
- PrivateKey: Fill in your PrivateKey
- Payment/Gateway URL: Fill in your Gateway URL
Log in to your moyidata cloak panel and retrieve these three data points from your profile.
Let's get started.
Login to moyidata cloak panel
Login to moyidata cloak panel
Setting up Site A and Site B domains
- Add Web Domain A and Web Domain B
- Please enter the domain name directly, without http or https.
- Site A is your high-risk website.
- Site B is the white website you created using WordPress or other PHP frameworks.
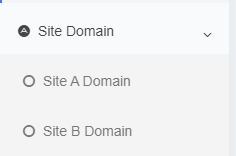
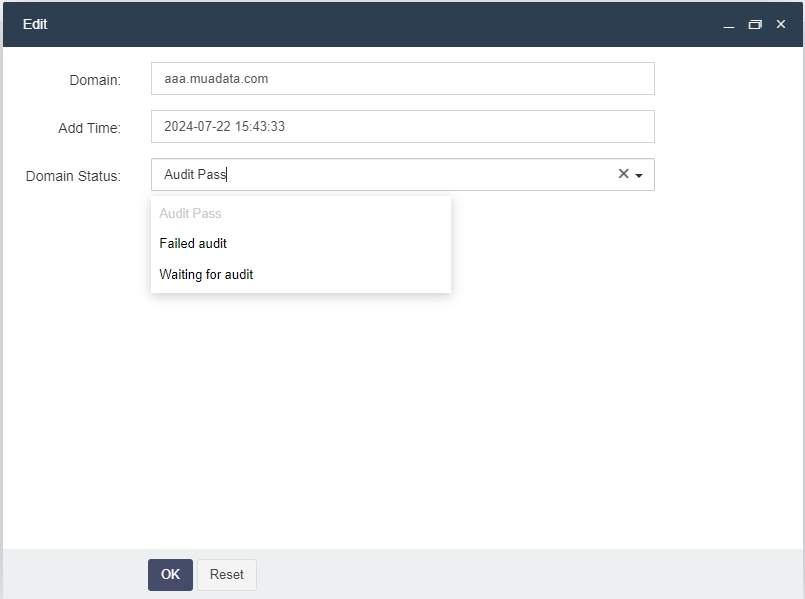
- For site A, after you have added it, please edit it again and change the status of the A site domain to “Audit Pass.
- For site B, when adding the domain, select the status as “Turn on.
Connect the payment gateway through Shopify.
- You need to connect your payment gateway, such as Shopify Payments or PayPal, to the white-label website created with Shopify.
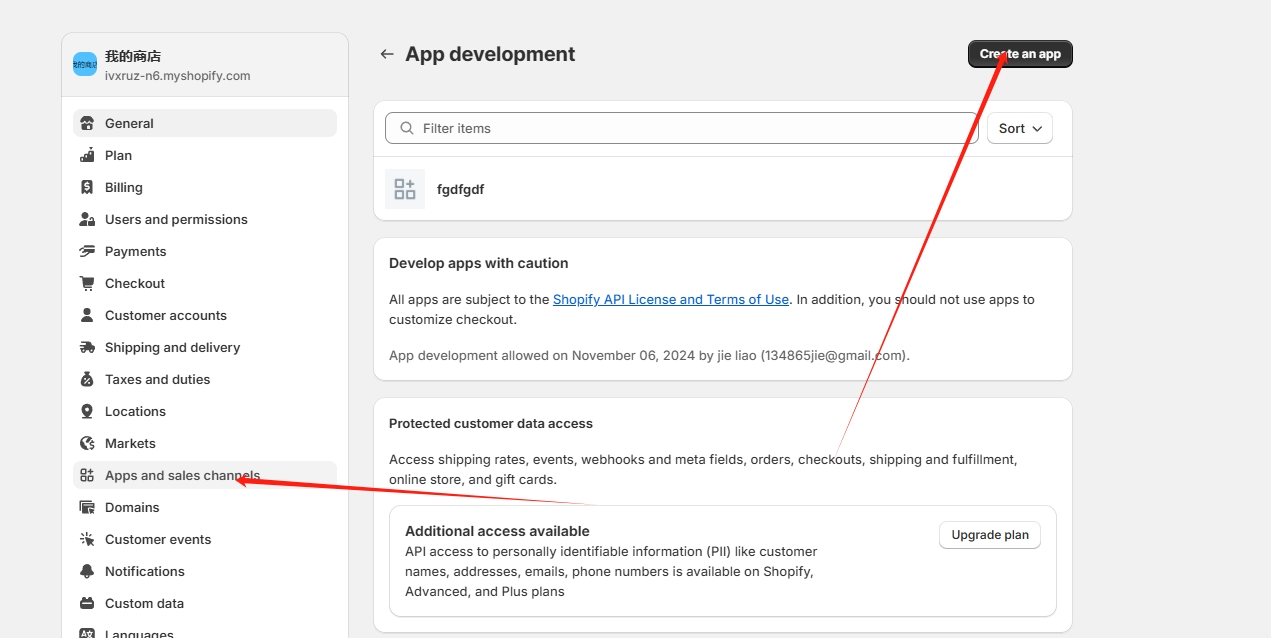
Create an app and obtain the API.
Open Shopify’s App and Sales Channel settings.
Then click “Develop” to enter the interface shown below.
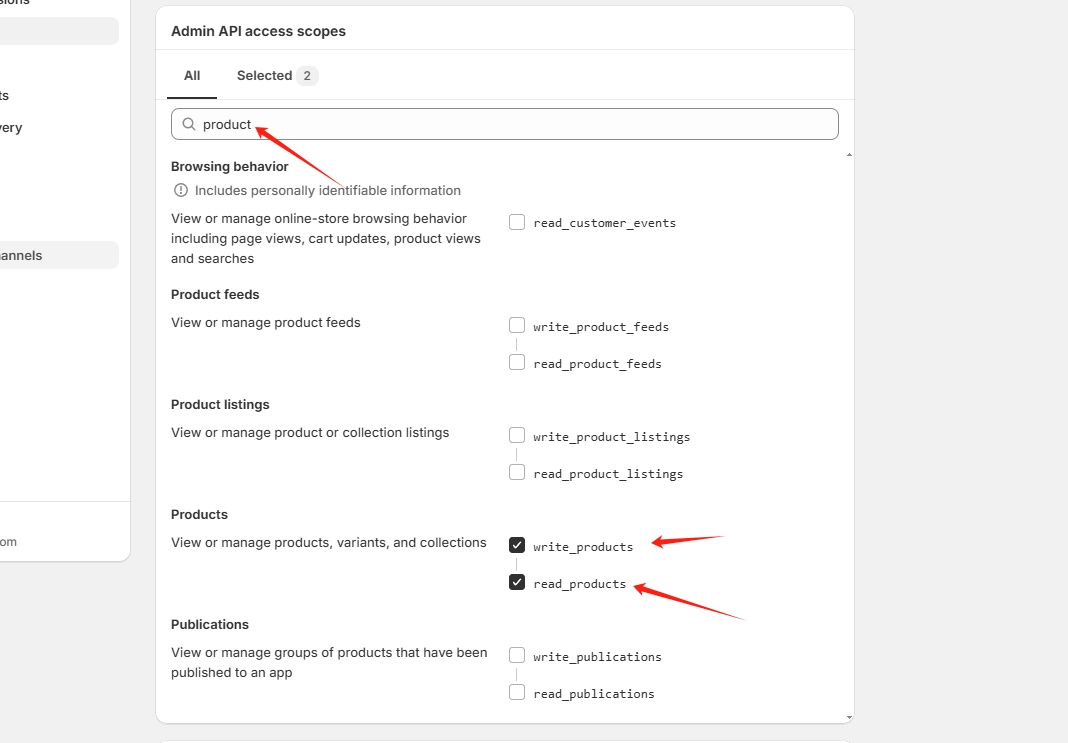
Click “Configure Admin API Scopes”.
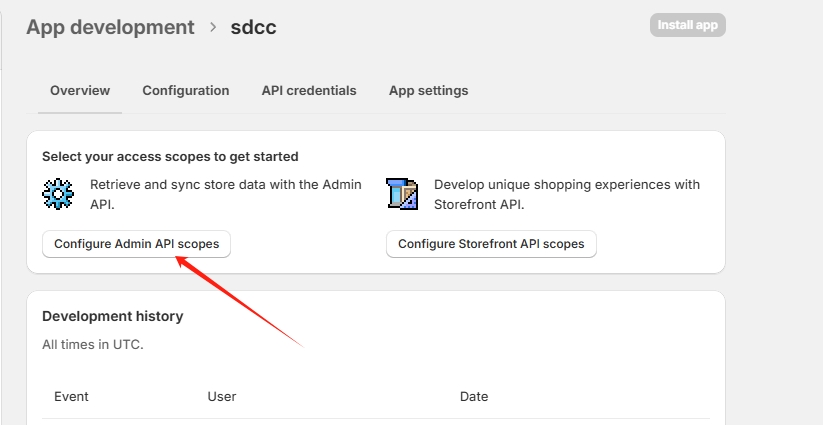
Search for product and select:
write_products
read_products
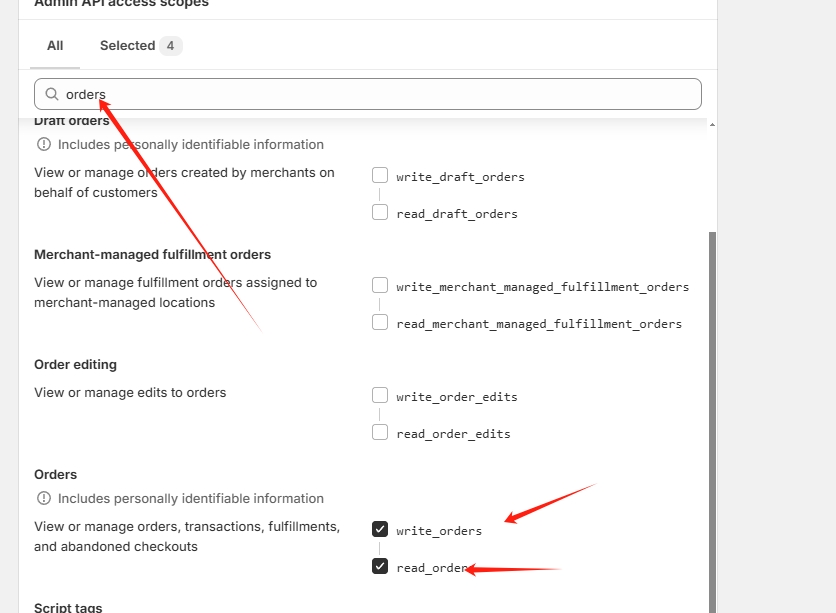
Search for orders and select:
write_orders
read_orders
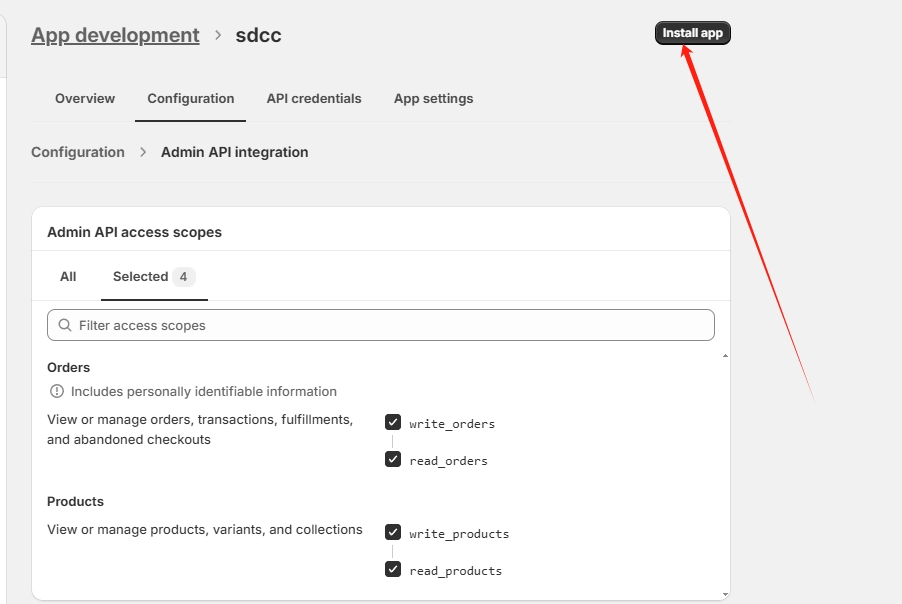
Save the configuration and install this app.
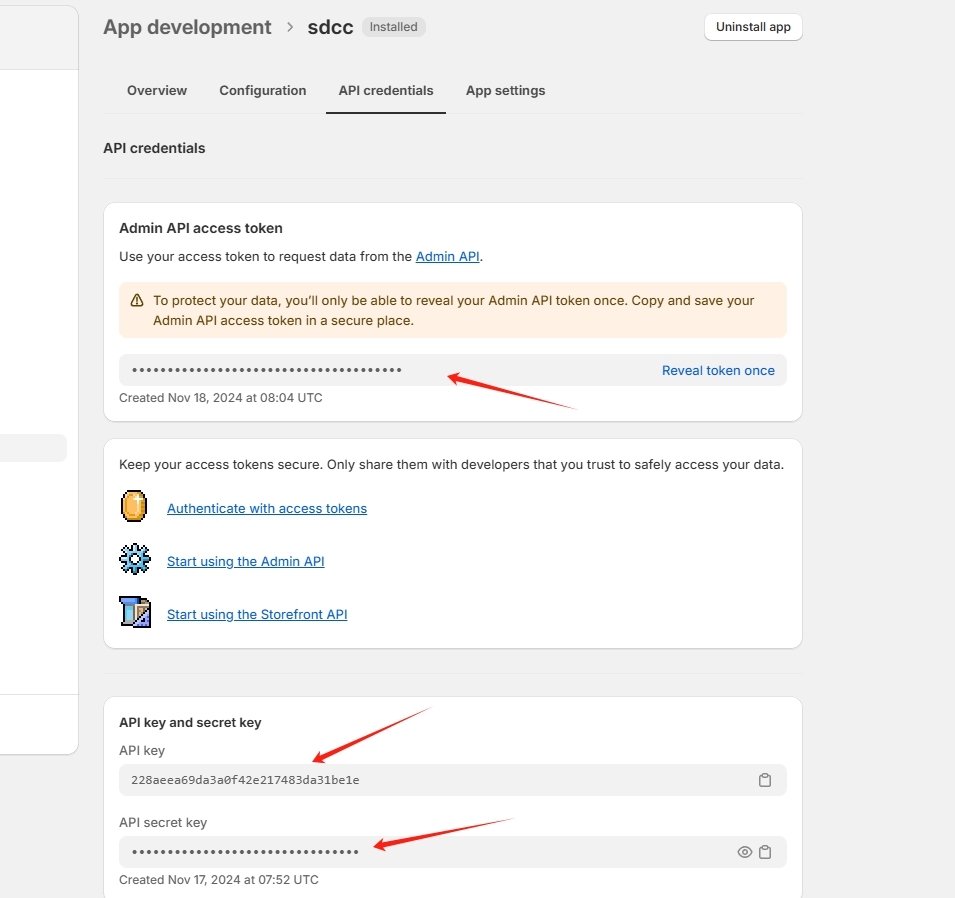
Click API Credentials,
copy and save the following:
– Admin API Access Token
– API Key
– API Secret Key
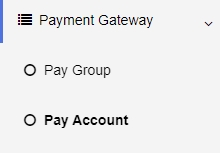
Create a payment account in the cloak panel.
- You need to create payment accounts and fill in the relevant information.
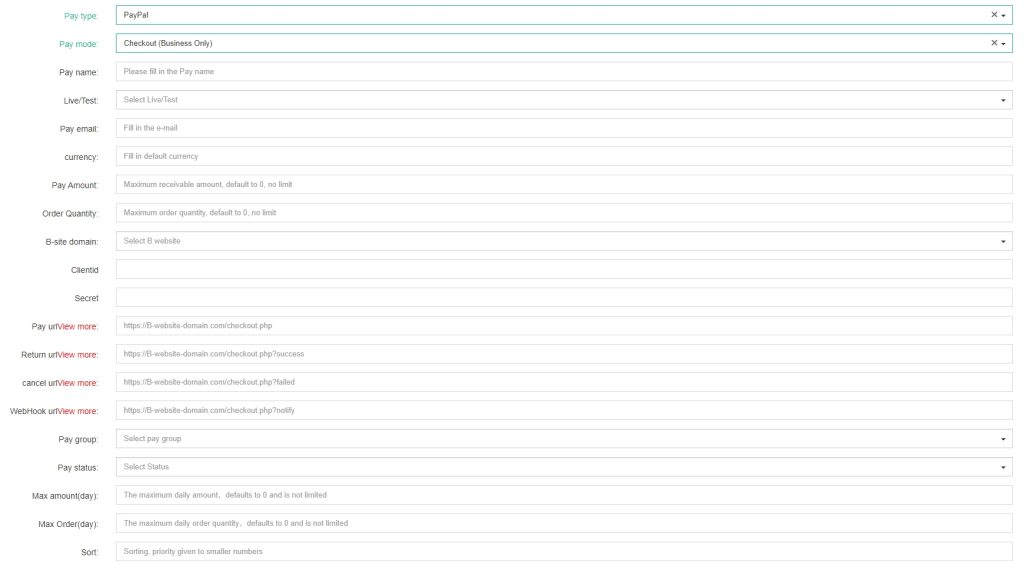
Shopify payment
- Pay type:Paypal,Please make sure to select this mode.
- Pay mode:Checkout (Business Only) ,Please make sure to select this mode.
- Pay name:Enter the name for your payment account, which is used for your own reference and will be visible only to you.
- Live/Test:live
- Pay email:Any email or the email of your Shopify white-label website.
- Currency: Enter your currency. If specified, payments will only be accepted in this currency, and payments in other currencies will fail. By default, this field is left blank.
- Pay Amount:Total payment amount for this account,Once the conditions are met, payments for this account will be suspended until you manually change the status to “Open.”
- Order Quantity:Total number of orders paid from this account,Once the conditions are met, payments for this account will be suspended until you manually change the status to “Open.”
- B-site domain: Select the B site domain you have added. Please note that this action will associate your payment account with the selected B site domain. If you don’t see your domain in the selection list, add your B site domain through the B site domain entry point.
- Clientid:Enter the Shopify API key (the one saved from the previous steps).
- Secret:Enter the Admin API access token (the one saved from the previous steps).
- Pay url :https://B-website-domain.com/shopifycheckout/checkout.php (Replace B-website-domain.com with your actual B site domain.The B-site domain is your white-label website created with WordPress or other PHP platforms.)
- Return url:https://shopify-website-domain.com (The domain of your white-label website created with Shopify.)
- Cancel url:https://shopify-website-domain.com (The domain of your white-label website created with Shopify.)
- WebHook url:https://B-website-domain.com/shopifycheckout/notify.php (Replace B-website-domain.com with your actual B site domain.The B-site domain is your white-label website created with WordPress or other PHP platforms.)
- Pay group:Select your payment group. Once you choose a payment group, this account will belong to that group.
- Pay status: Open (Other statuses are set to auto-detect by default. For example, if your account is banned, our panel will automatically detect this and change the account status to “Payment account ban.”)
- Max amount(day):Daily maximum payment amount: If there is no limit, enter 0. If you enter another number, once this amount is reached, the account will not process any more payments for the day and will automatically switch to the next account.
- Max Order(day):Daily maximum order quantity: If there is no limit, enter 0. If you enter another number, once this number is reached, the account will not process any more orders for the day and will automatically switch to the next account.
- Sort: The smaller the number, the higher the priority, with 0 being the highest priority.
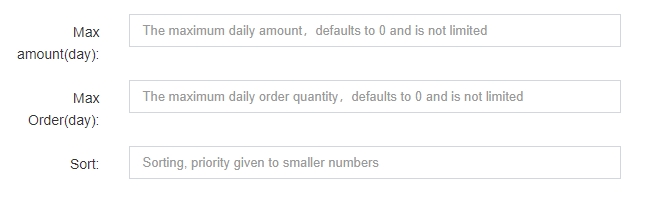
With these three items, you can set up some rotation payment rules. For example, if you have 10 PayPal accounts, you can set the daily maximum payment amount for each account to $500 and use sorting to set the priority level for each account. When the first account reaches $500, the next order will use the second account in this payment group.